![]()
![]()
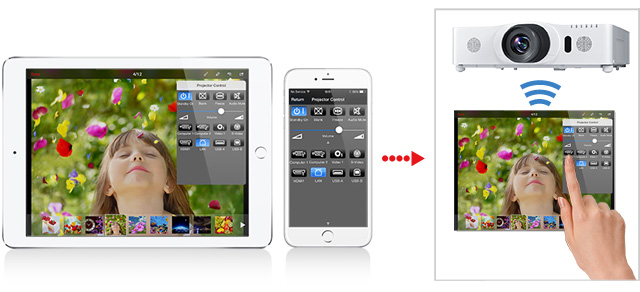
Projector Quick Connection is an application that projects images, documents, and web pages from an smart devices onto a Hitachi Projector by transferring them through a wireless LAN (Wi-Fi).
* The images on this page are from "PJ Quick Connection" for iPhone / iPad.
You can use an smart device to easily control the projector allowing you to have a smooth presentation.
When projecting documents, pictures and web pages, remote control can also be used.
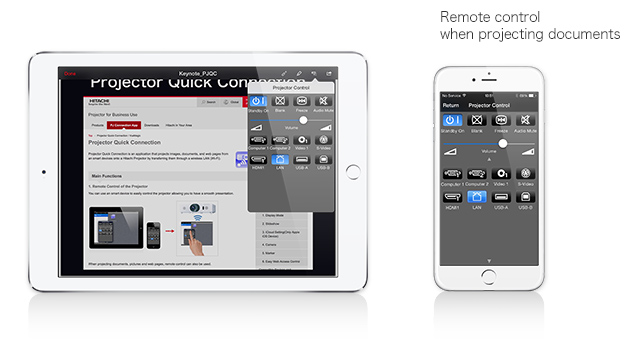
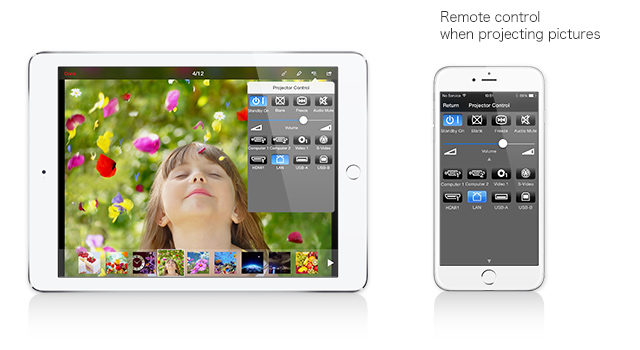
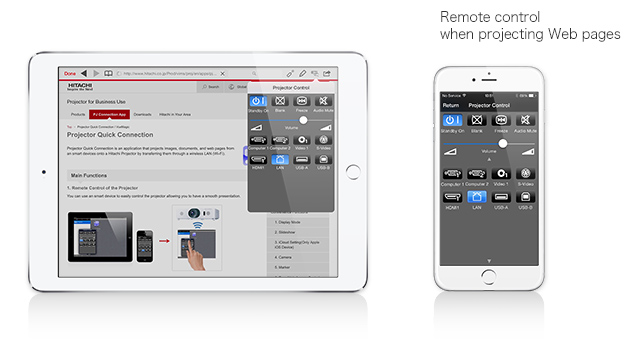
[Functions that can be Controlled Remotely]
- Standby/On - Input - Volume - Audio Mute - Blank - Freeze
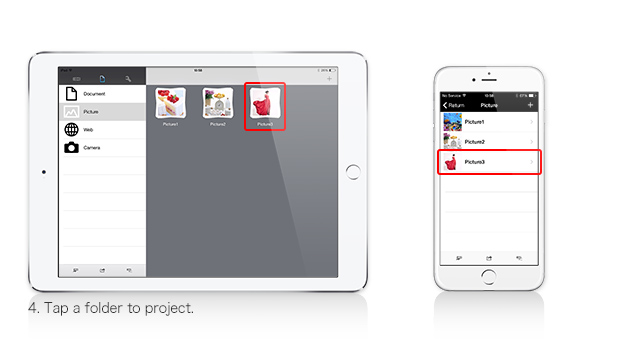
From the "Contents" tab in Projector Quick Connection, you can project images, documents, and web pages onto a Hitachi Projector.
2-1. Project Images
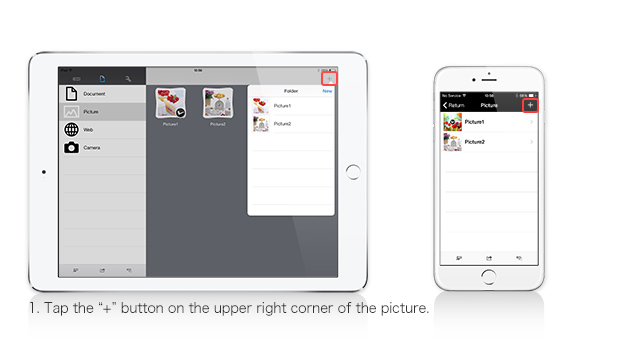
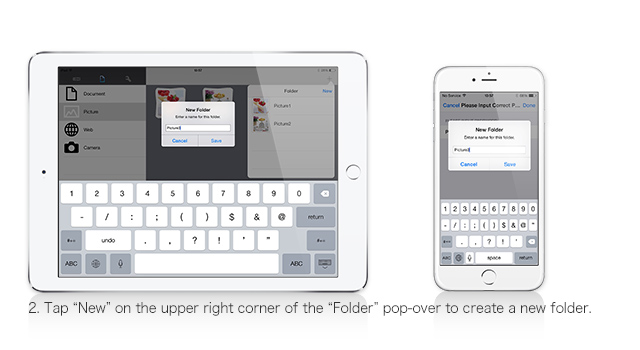
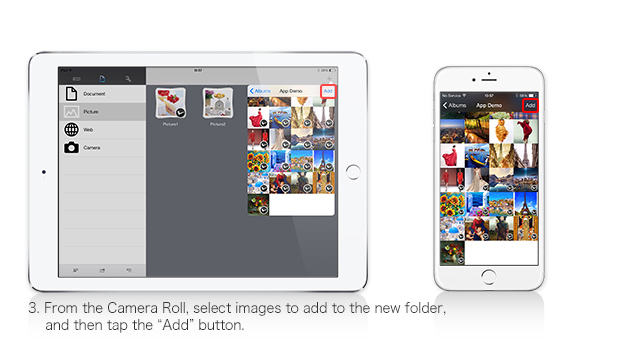
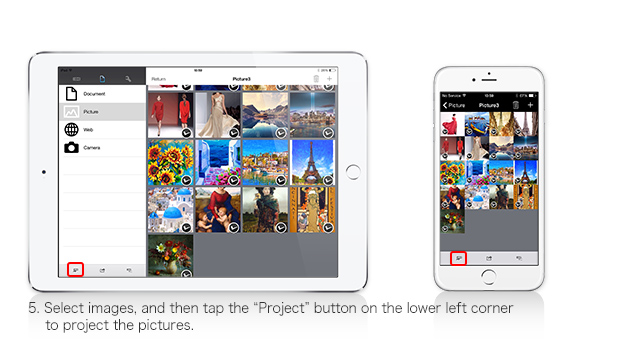
Projector Quick Connection imports images from the smart device Camera Roll and projects them onto a Hitachi Projector.
2-2. Project Documents
You can project a variety of documents onto a Hitachi Projector. (View specifications)
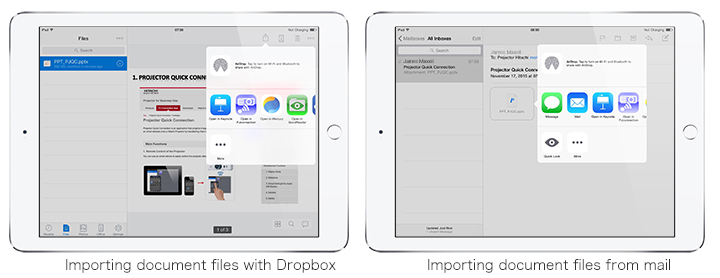
For iOS:
You can import documents from attachment files of e-mail, Dropbox® and Evernote® etc.
You can add files by using iTunes® or Finder®. And you can also download/upload documents to iCloud automatically.
For Windows:
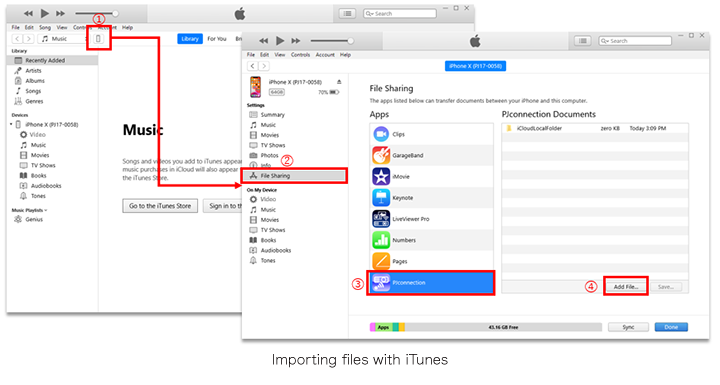
Step1. Click "DEVICE"
Step2. Click "File Sharing"
Step3. Click "PJ Connection"
Step4. Click "Add"
For Android™
You can add files to folders of Android devices.
* In case of Android Application, PDF files are only compatible.
For Mac OS:
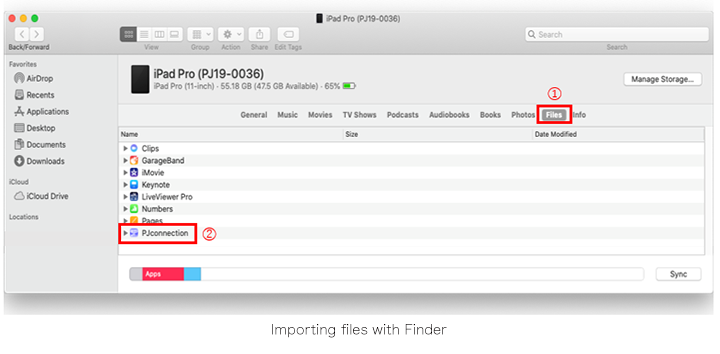
Step1. Click "Files"
Step2. Drop file to PJconnection
* The method of importing files may differ depending on the version of your Mac OS. For details, please refer to your device's manual.
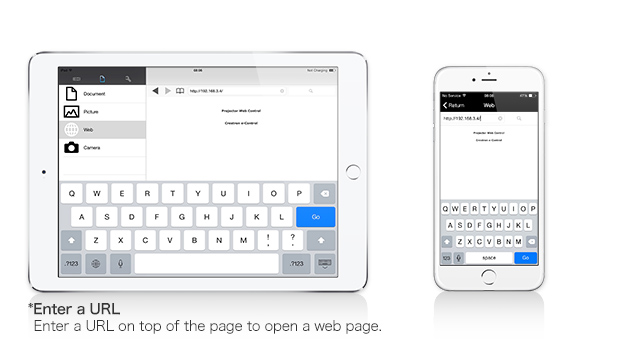
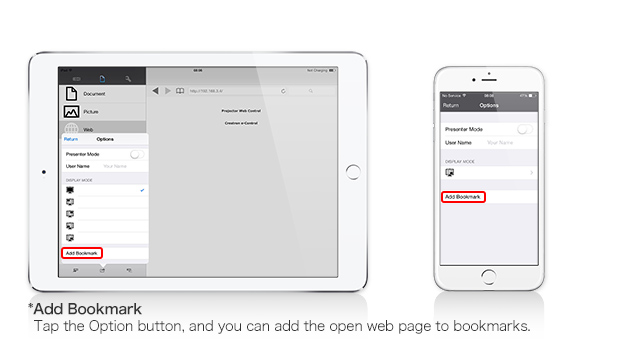
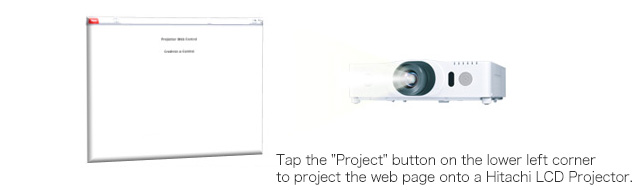
2-3. Project Websites
You can project websites onto a Hitachi Projector. You can also save bookmarks of frequently visited sites and easily open those sites.
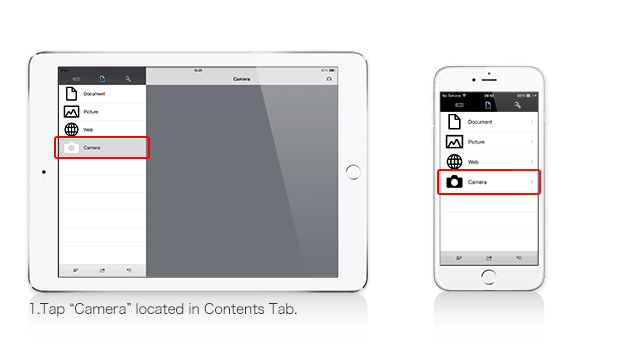
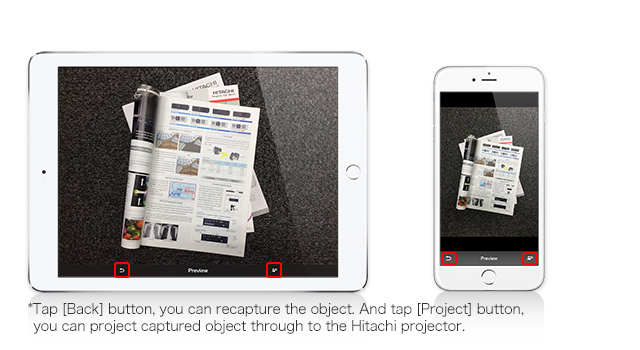
2-4. Camera
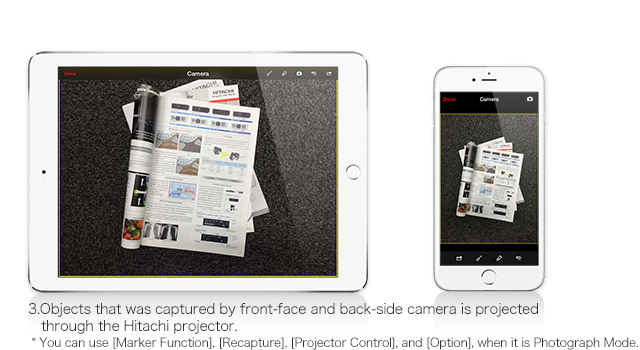
Camera function can project the caputured images of books and objects that was taken by camera function instead of document camera.
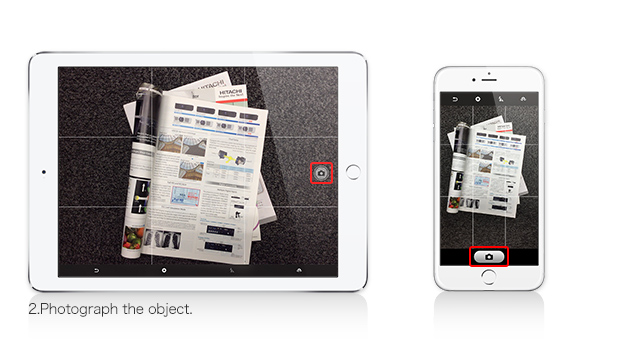
2-4-1. Photograph Mode
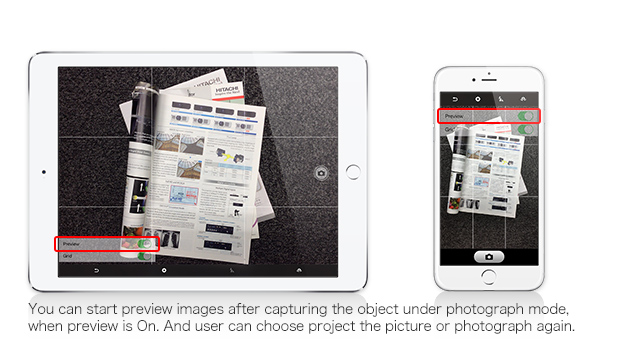
2-4-2. Preview Mode Setting (Default of preview : off)
When the photograph mode is active, you can set the preview functions tapping the option button.
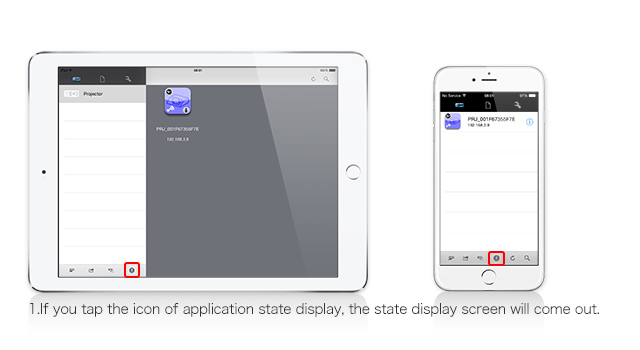
Monitoring is a function that you can check battery state, lamp time and other information on PJ Quick Connection. And can send error information to the application if an error occurs on projector.
3-1. Monitoring Function

・Projector Name
・Power Status
・Input Source
・Lamp-1 Time (*1)
・Lamp-2 Time (*1)
・Light Source Time (*1)
・Filter Time
・Error Status (*2)
・Input Signal Info
・Output Resolution
・System Time
・Lamp Circle Info (*1)
・Power Voltage
・Temperature
・Network Setting
・Serial Number
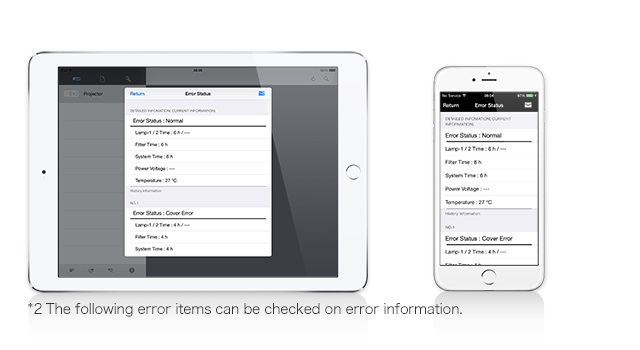
・Cover Error
・Fan Error
・Fan Warning
・Lamp Error
・Light Source Error (*3)
・Temp Error
・Air Flow Error
・Cold Error
・Filter Error
・Shutter Error
・Lens Shift Error
・Lamp-1 Warning (*3)
・Lamp-2 Warning (*3)
・Light Sourtce Warning (*3)
・Humidity Warning
・Color Wheel Error
・Lens Door Error
・AC Black Out Error
・Other Warning
・Other Error
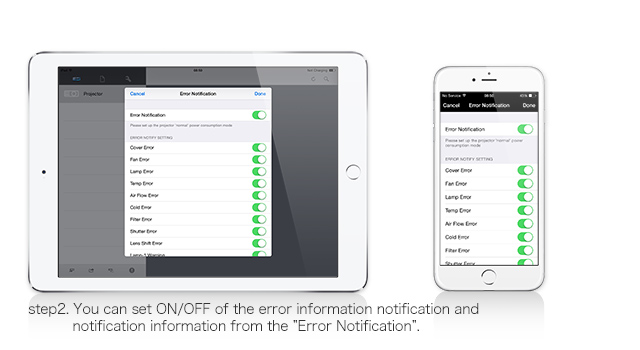
3-2. Error information notification settings
You can set On/Off of the error information notification and notification information.
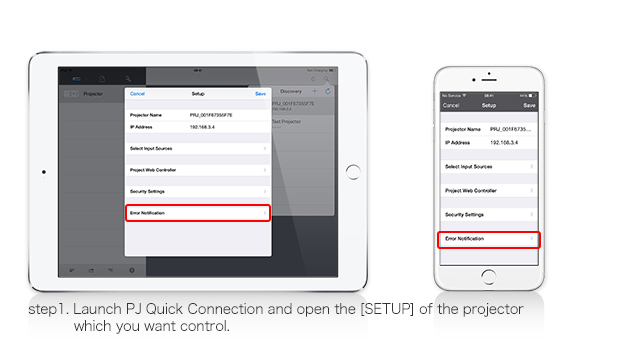
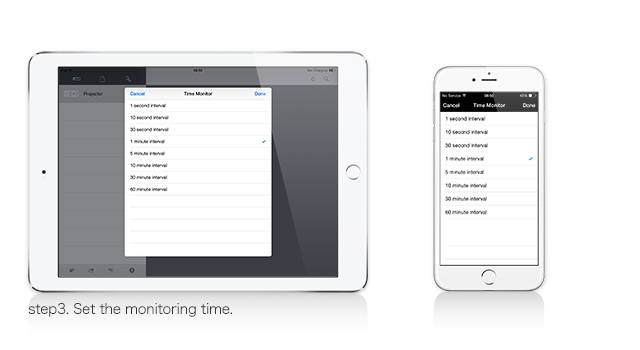
You can set the monitoring time to 1 second, 10 seconds, 30 seconds, 1 minute, 5 minutes, 10 minutes, 30 minutes, 60 minutes.
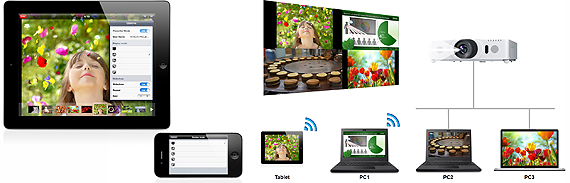
1. Display Mode
You can split the screen into 4 parts and simultaneously project up to 4 iPads and computers from the Display Mode in the Projection Quick Connection Option Settings tab.
[Files that can be Projected]
[iOS]
- Microsoft® Word (.doc, .docx)
- Microsoft® Excel (.xls, .xlsx)
- Microsoft® PowerPoint (.ppt, .pptx)
- Pages (.pages)※1
- Numbers (.number)※1
- Keynote (.key)※1
- PDF (.pdf)
- JPEG (.jpeg, .jpg)
- PNG (.png)
[Android]
・PDF (.pdf)※2
・JPEG (.jpeg, .jpg)
・PNG (.png)
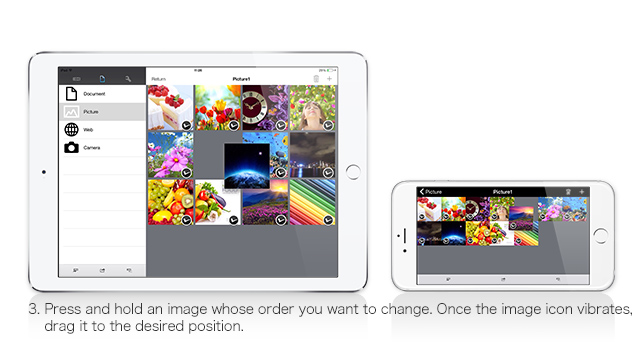
2. Slideshow
You can set a slideshow from "Options" while projecting images, and view the slideshow of the selected images.
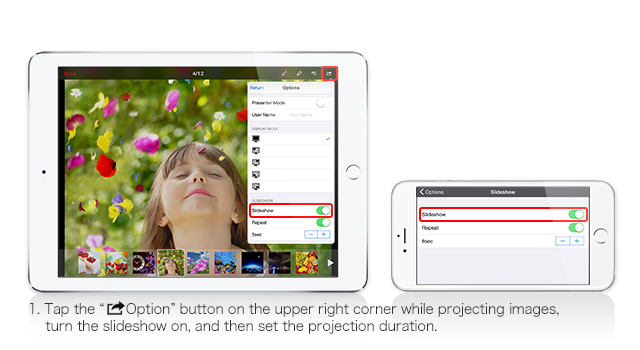
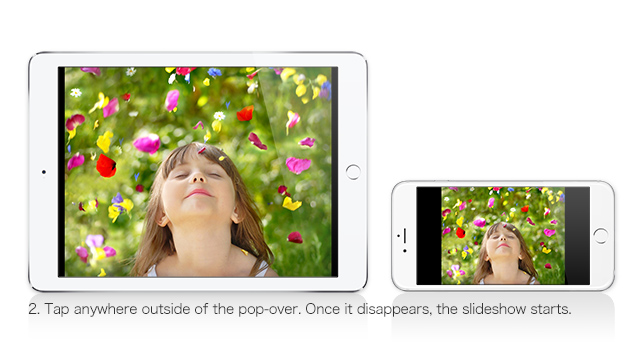
* The images in the slideshow switch smoothly, so you can change the order of the images.
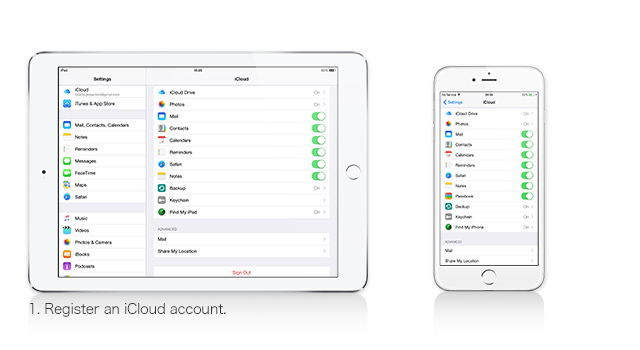
3. iCloud Setting(Only Apple iOS Device)
Files saved in the Projector Quick Connection "Document" folder are automatically uploaded to iCloud, and the same data can be viewed from iPads and iPhones using the same iCloud account.
3-1. How to turn the iCloud setting On/Off
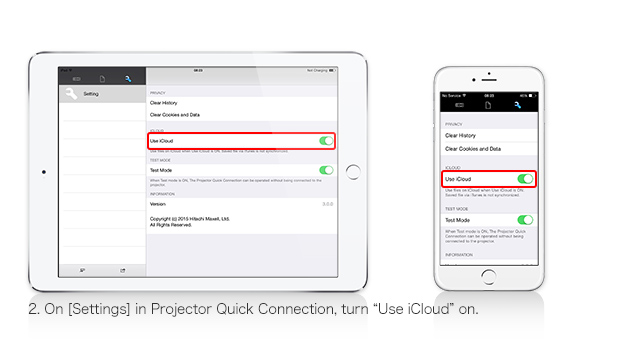
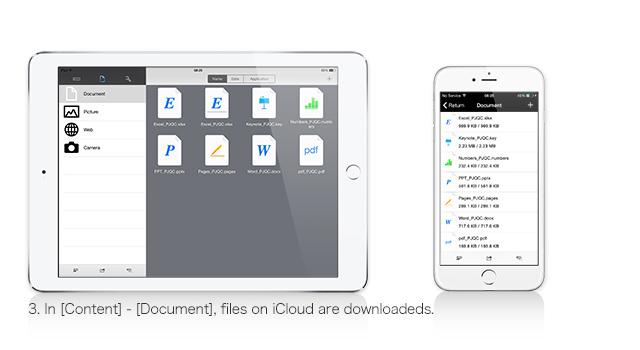
* Regardless of the communication speed, such as Wi-Fi, 3G or 4G, files can be uploaded to and downloaded from iCloud.
Note
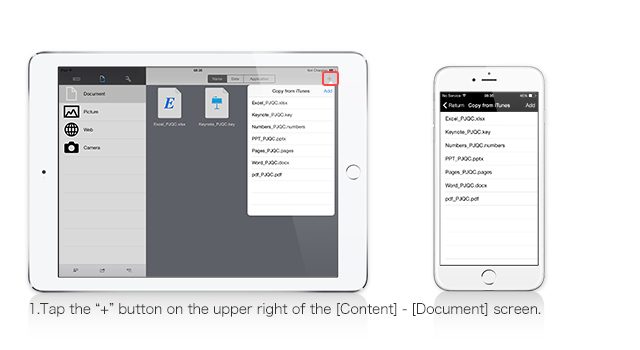
3-2. How to add files inserted from iTunes onto iCloud (iCloud setting: "ON")
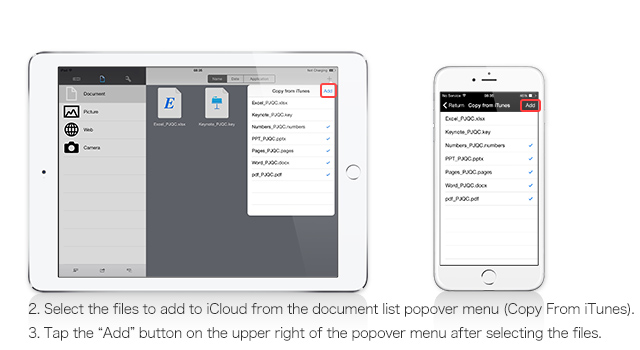
In order to add documents inserted from iTunes onto iCloud, the files must be manually added to iCloud from the iTunes folder.
* For details about how to add documents from iTunes, refer to the "document files with iTunes" in "2.Project Documents".
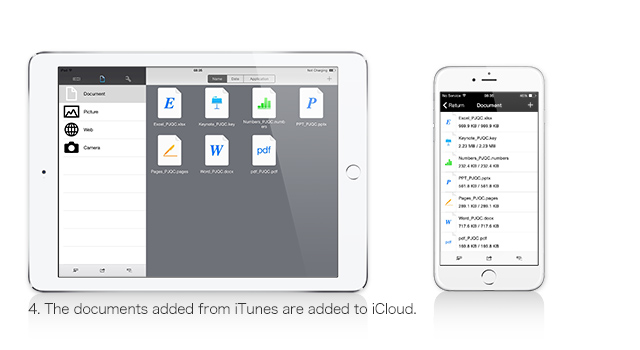
* Documents that are saved on iCloud can not add to iTunes folder.
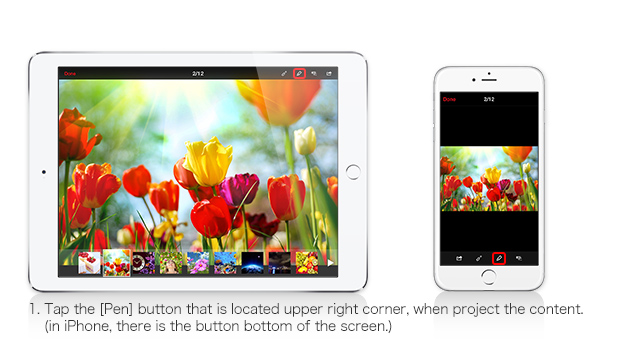
4. Marker
Marker function can project contents (documents, pictures, web sites, and camera) by using fingers.
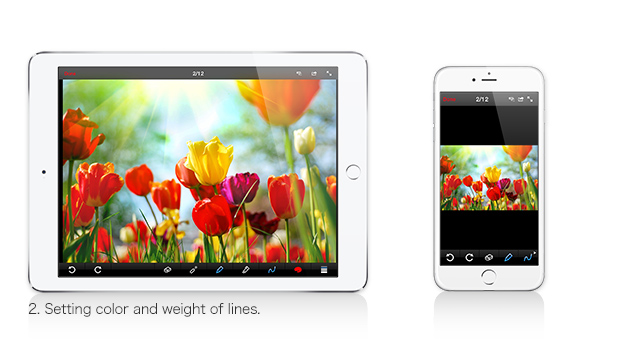
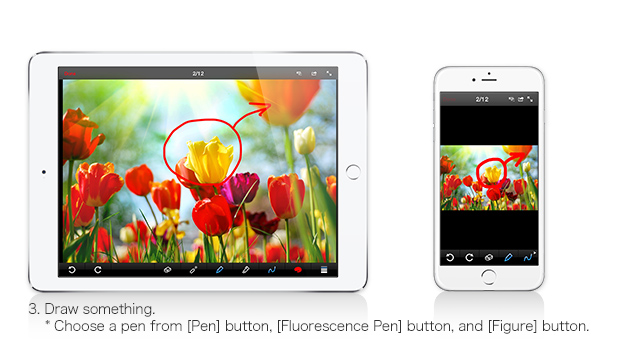
4-1. Drawing Function
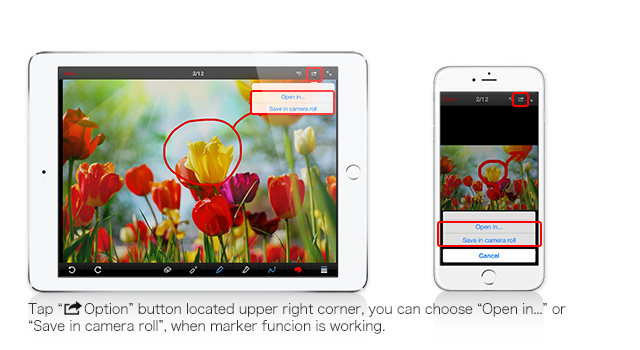
4-2. Open other application / Save the image to the camera roll.
You can save pictures that drew on the display to camera roll in png form. Or open other application.
5. Easy Web Access Control
5-1. Easy Projector Web Access Control
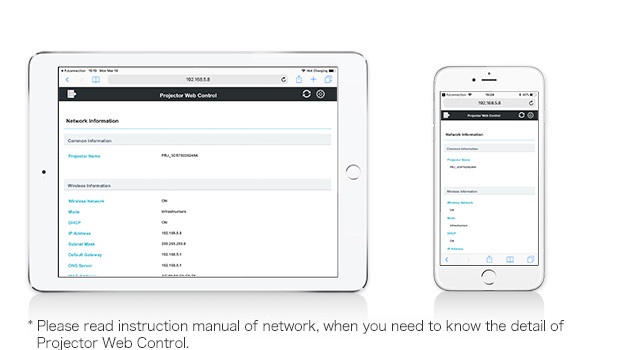
You can access to the projector web control easily that control various settings such as Hitachi projector from web pages.
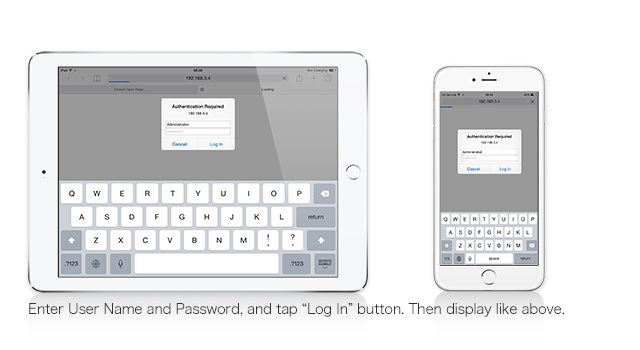
You need to enter User Name and Password when using projector web control.
6. Security Function
Security function is a function that prevents the content projection and projector control from an unauthorized user. In order to use this function, the security setting of projector side and password input of application side are required in advance.
6-1. Security settings on the projector side
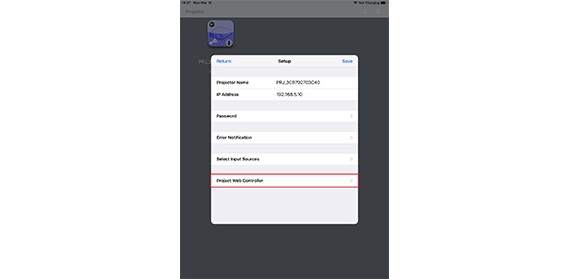
![step1. Access the projector web control.
※You can access projector web control from [Projector]-[Projector Setup (Projector icon(i))]-[Projector Web Controller] of the PJ Quick Connection application](images/pj_connection/u06_Security_01_Projector_01.jpg)
![step2. Please set the password of [Security Settings]-[Network Control].(This setting is not required if only network presentation is limited.)](images/pj_connection/u06_Security_01_Projector_02.jpg)
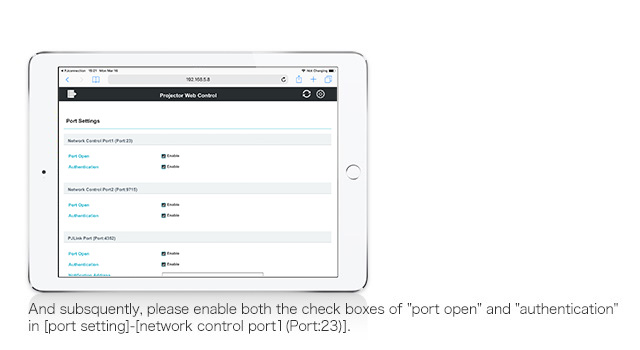
Notice : This password can be used in common projector control function which using network control port 1 (Port : 23) or port 2 (Port : 9715), PJ Link function, my image fucntion and messenger function. If you want use these functions, please note that the password will be changed.
* For details about how to add documents from iTunes, refer to the "document files with iTunes" in "2.Project Documents".
6-2. Password input in the application side
![step2. Enter the password you set in the projector into [Security Settings]-[Projector Control] and [Network Presentation].
※ If you want to delete the password, please erase the entered password and click](images/pj_connection/u06_Security_02_App_02.jpg)
reference : If the password set in application and the one set in projector do not match, password entry screen will be displayed when you run "Projector Control" and "Content Projection". If you enter the correct password set in the projector, it will also be automatically reflected in the [Security Settings] on 2)-step2.
1. Compatible Devices
| Application | Compatible OS version |
|---|---|
| Projector Quick Connection for iPad® (Free) | iOS 11.0 or later or iPadOS |
Projector Quick Connection for iPhone® (Free) |
iOS 11.0 or later |
Projector Quick Connection for Android (Free) |
Android 5.0 or later |
2. Connection Settings
To connect a Hitachi Projector to Projector Quick Connection, the smart device and Hitachi projector must be connected to the same Wi-Fi network.
The optional USB wireless adapter (USB-WL-11N or USB-WL-5G) can be needed to make wireless environment.
2-1-1. Configuring an iPad/iPhone Wi-Fi
Use the following instructions to connect an iPad/iPhone to a Wi-Fi network.
2-1-2. Configuring an Android Wi-Fi
Configuring an Android device Wi-Fi. Use the follwing instructions to connect an Android device to a Wi-Fi network.
2-1-3. Configuring a Hitachi Projector Wi-Fi
Use the following instructions to connect a Hitachi Projector to a Wi-Fi network.
Hitachi Projectors support infrastructure and ad hoc modes.
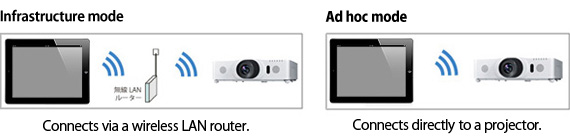
* It is incompatible to connect Ad hoc mode, when using Android devices.
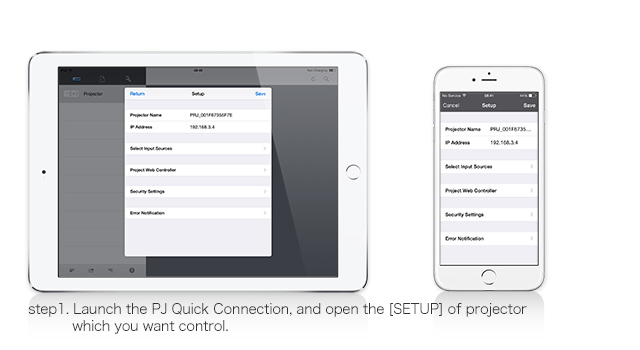
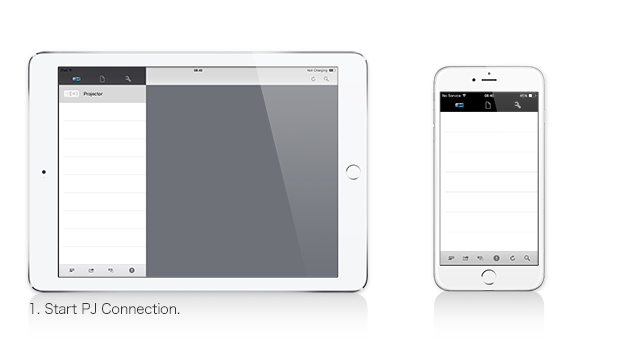
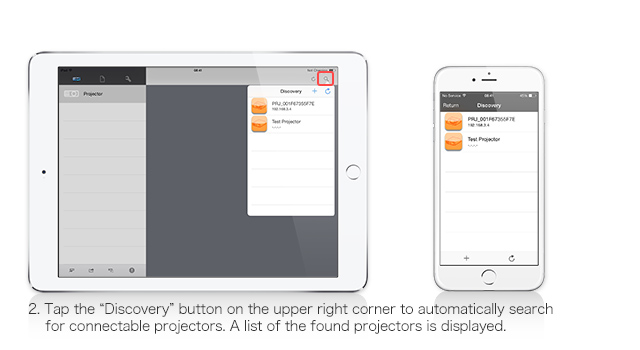
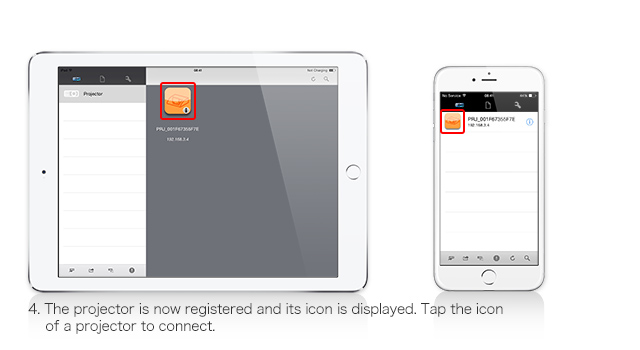
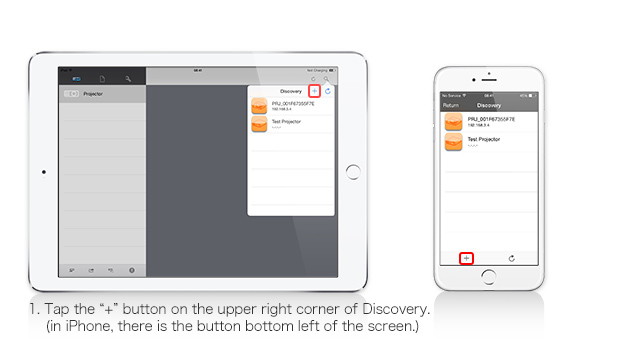
Start Projector Quick Connection (PJ Connection), and then tap the "Discovery" button on the upper right corner to perform an automatic search for Hitachi Projectors. Tap the found projector, and then tap the "Save" button to complete the registration of the Hitachi Projector.
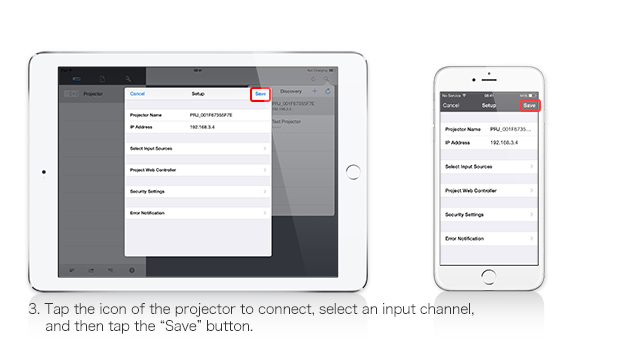
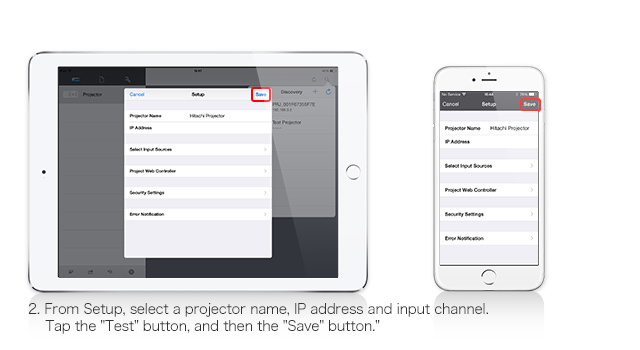
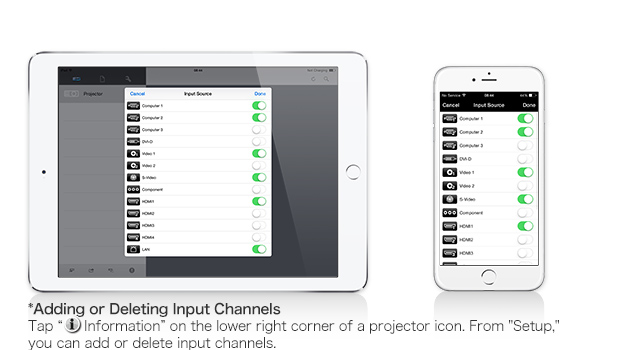
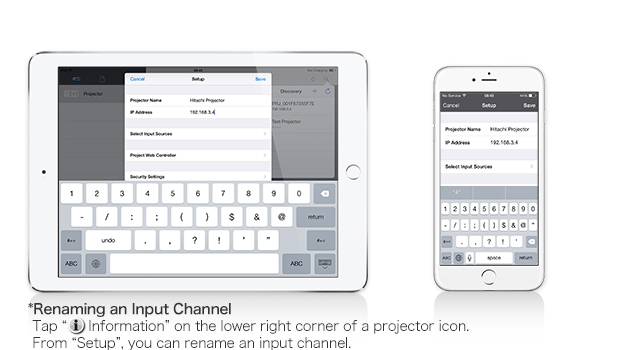
Tap "![]() information" on the lower right corner of a projector icon. From "Setup," you can edit the projector.
information" on the lower right corner of a projector icon. From "Setup," you can edit the projector.
You must download the dedicated application from the iTunes App Store℠.
![]() Projector Quick Connection for iPad
Projector Quick Connection for iPad
![]() Projector Quick Connection for iPhone
Projector Quick Connection for iPhone
You must download the dedicated application from the Google Play.
![]() Projector Quick Connection for Android
Projector Quick Connection for Android
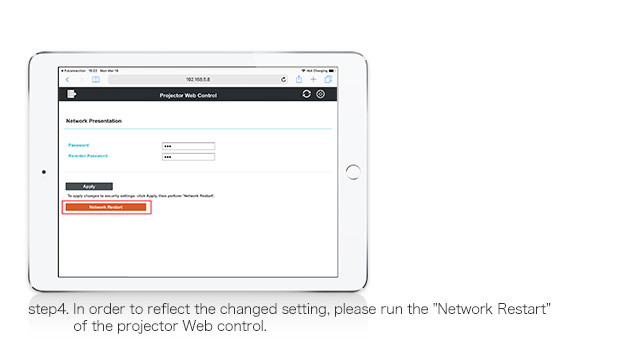
![step3. Please set the password of [Security Settings]-[Network Presentation].(This setting is not required if only projector control is limited.)](images/pj_connection/u06_Security_01_Projector_03.jpg)